Professional Interior Design Photography Tips: A Complete Guide

Table of Contents
Plan Your Shoot and Create a Shot List
Master Interior Photography Lighting for Every Room
How to Style a Room for Photos That Sell
Interior Photography Composition and Camera Angles
Choosing the Best Lens for Interior Photography
Camera Settings and Exposure Workflow
Post-Processing and Color Accuracy
Image Rights and Professional Deliverables
Frequently Asked Questions
Last Updated: October 17, 2026
Plan Your Shoot and Create a Shot List
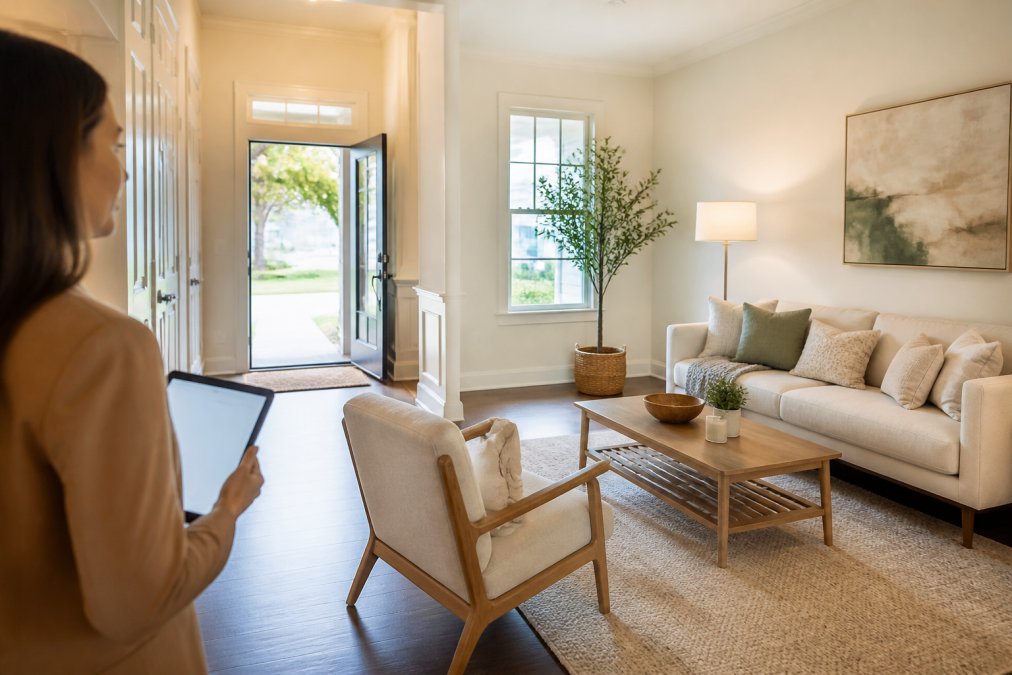
Professional interior design photography tips start with planning. Before you pick up a camera, create a detailed shot list that covers every angle and detail your client needs.
A shot list is your roadmap: it prevents missed shots and keeps the shoot efficient. List the rooms, specific angles, and design details needing close-ups.
Include these shot types in your list:
Wide shots showing the full room layout
Medium shots of key furniture pieces and design elements
Detail shots of accessories, textures, and finishes
Corner shots that show how spaces flow together
Shots from doorways showing entry perspectives
Close-ups of architectural details like molding or hardware
The best shot lists put the designer's or agent's priorities first. Ask what sells the space, the kitchen's new cabinetry, the bedroom's custom lighting, the living room's view, and put those hero shots at the top.
Time your shoot strategically: morning light suits east-facing rooms, afternoon light west-facing ones. Plan room order around natural light patterns to save time and avoid fighting poor lighting.
Communicate with the owner or designer before arriving. Confirm access times, ask about occupied spaces, and clarify off-limits rooms, a five-minute conversation prevents delays.
Master Interior Photography Lighting for Every Room
Lighting makes or breaks interior design photography. Natural light is your first choice, but you need to manage it strategically.
Window light creates soft, flattering illumination. Position your camera to catch light through windows without harsh shadows. Overcast days are ideal; on bright sunny days, use sheer curtains or diffusion panels to soften direct rays.
Different rooms need different lighting approaches:
Kitchens: Shoot during midday when overhead light is brightest. Use window light to highlight countertops and backsplashes.
Bathrooms: Rely on window light if available. Use a reflector to bounce light into darker corners.
Bedrooms: Soft morning or late afternoon light flatters these intimate spaces. Avoid harsh midday shadows.
Living rooms: Position yourself to capture window light on seating areas. This draws the viewer's eye to the focal point.
Supplemental lighting fills shadows without looking artificial. A white foam board or silver reflector positioned opposite your light source bounces natural light into dark areas and softens shadows.
Avoid heavy-handed artificial lighting, studio lights look out of place in homes. If you must add light, use soft boxes or diffusers to mimic natural window light for balanced, authentic illumination.
White balance matters more than most photographers realize. Tungsten bulbs cast warm orange tones; cool LEDs look blue. Match your camera's white balance to the room's dominant light source to prevent color casts that demand heavy editing later.
How to Style a Room for Photos That Sell
Room styling transforms ordinary spaces into compelling design showcases. This is where interior design photography tips become visual storytelling.

Start by decluttering aggressively. Remove personal items, family photos, and excess accessories, empty shelves look intentional, while clutter distracts from the design. Keep only items that support the story you're telling.
Establish a cohesive color palette of three or four complementary tones. Neutral walls work with any accent colors; if walls are already painted, coordinate furniture and accessories to match. Mismatched colors confuse the eye.
Create clear focal points. Every room needs one area that draws attention first, a fireplace, artwork, a statement chair, or a view. Arrange furniture and styling to direct the gaze there, and remove competing elements.
Neutral accessories work universally, white linens, cream throw pillows, natural wood accents, and soft textiles appeal broadly. Avoid bold patterns or trendy colors that date quickly; showcase the room's architecture and design, not your personal taste.
Pay attention to negative space. Empty areas give the eye places to rest and make spaces feel larger. Don't fill every corner, let rooms breathe.
Interior Photography Composition and Camera Angles
Composition determines whether a photo feels balanced and professional. Master these fundamentals and your interior design photography tips will produce gallery-quality results.
Becki and Chris
Choose your primary angle first. Most rooms photograph best from a corner, which shows two walls, creates depth, and reveals flow. Straight-on shots of single walls feel flat; diagonal angles add dimension.
Vertical lines must be straight, converging lines make rooms look unstable. Use your camera's level or grid lines, and correct any convergence in post-processing with perspective correction tools. Viewers notice tilted walls immediately.
Doorknob height provides a natural camera position. Shooting from roughly 3-4 feet high shows rooms as people actually experience them. Avoid extreme angles, floor or ceiling shots create amateurish distortion.
Wide-angle lenses expand spatial perception. A 16-35mm range captures more of the room without requiring you to step back. This works especially well in small spaces. However, wide angles distort edges.
Create visual balance by distributing weight evenly: a large sofa on the left needs a substantial element on the right. Asymmetrical balance works too but requires more careful arrangement.
Lead the viewer's eye through the room using sightlines from furniture placement, hallways, or architectural features.
Choosing the Best Lens for Interior Photography
Lens selection shapes how your interior design photography tips translate into actual images. The right lens makes your job easier and produces better results.
Wide-angle lenses (16-35mm) capture entire rooms in tight spaces. They're essential for small apartments, bathrooms, and kitchens where you can't step back far enough. The tradeoff is distortion at the edges.
Standard lenses (35-50mm) produce natural perspectives matching human vision. They suit detail shots and medium-distance room views, requiring more movement to frame but delivering authentic, less distorted results.
Zoom lenses (24-70mm) offer flexibility, letting you adjust framing without moving your tripod, practical when working quickly or in confined spaces. Quality zooms are expensive but worth it for professional work.
Avoid telephoto lenses for interior work. Lenses longer than 70mm compress space and make rooms feel smaller. They're useful for specific detail shots but impractical for capturing room layouts.
Prime lenses deliver superior image quality to zooms at the same price. A 24mm and 50mm prime give two excellent focal lengths without a zoom's weight, many professionals prefer this for interior work.
Your lens choice depends on the spaces you shoot most. Tight urban apartments demand wider angles; spacious suburban homes allow standard focal lengths.
Camera Settings and Exposure Workflow
Technical precision separates professional interior design photography tips from amateur snapshots. Master these settings and your images will be consistently excellent.
Start with aperture priority mode. Set f/5.6 or f/8 for maximum sharpness throughout the room; at f/2.8 the foreground and background fall out of focus.
ISO should be as low as possible while maintaining proper exposure. Start at ISO 100 or 200 in bright natural light.
Shutter speed depends on your tripod and lighting. Use 1/60th of a second or faster to avoid camera shake; in dim rooms you might need 1/30th or slower.
White balance sets your color temperature. Use daylight white balance (5500K) for rooms with strong window light. Switch to tungsten (3200K) for rooms lit primarily by warm bulbs.
Exposure metering should be set to matrix or evaluative mode. This measures light across the entire frame and produces balanced exposures. Spot metering can work for specific areas but requires more adjustment.
Bracket your exposures in challenging lighting. Take three shots: one at your meter's recommended exposure, one slightly underexposed, and one slightly overexposed.
Use manual focus for precise control. Autofocus can hunt in dim rooms or miss your intended focal point. Manual focus lets you lock focus on the exact area you want sharp.
Post-Processing and Color Accuracy
Raw files from your camera are just the starting point.
Open your RAW files in Lightroom or a similar editor. Adjust white balance first. If your in-camera white balance wasn't perfect, correct it now.
Exposure adjustments come next. Brighten underexposed areas using the exposure slider. Reduce highlights if they're blown out. The goal is balanced exposure across the entire frame.
Clarity and vibrance enhance details without oversaturating. Increase clarity slightly to make textures pop. Boost vibrance to make colors more vivid without making them look artificial.
Perspective correction fixes converging vertical lines. Lightroom's lens correction tools straighten walls automatically. For more extreme distortion, use the Transform panel to manually adjust perspective.
Color grading creates a cohesive look across your portfolio. Apply a consistent color grade to all images from a shoot.
Spot removal eliminates distracting elements. Remove dust spots, stray objects, or temporary items that shouldn't be in the final image.
Sharpening brings out fine details. Use a moderate amount of sharpening to enhance texture without creating halos around edges. Overdone sharpening looks artificial and cheap.
Export images at appropriate resolution. For web use, 1920 pixels on the long side is sufficient. For print or large displays, export at full resolution.
Image Rights and Professional Deliverables
Understanding image rights protects both you and your clients.
Clarify usage rights in your contract before the shoot. Specify whether the client can use images for marketing, social media, or print materials.
Copyright remains yours unless you explicitly transfer it. You own the images you create. This distinction matters for your portfolio and future licensing opportunities.
Obtain written permission before photographing occupied properties. Tenants have privacy rights. Get signatures acknowledging that photos will be used for marketing purposes.
Model releases aren't typically needed for interior photography unless people are clearly visible in images.
Deliver images in a professional format. High-resolution JPEGs work for most clients. Provide a reasonable number of edited images from your shoot.
Include usage guidelines with your deliverables. Specify how the images can be edited, whether they can be cropped, and any other restrictions.
Create a backup system for all image files. Store originals on multiple external drives and cloud services. Professional photographers lose images to equipment failure.
Maintain organized file systems that make finding images easy. Create consistent folder structures with clear naming conventions.
Professional interior design photography transforms spaces into compelling visual narratives that attract buyers and showcase design excellence.
REimage Real Estate Media specializes in exactly this kind of professional photography. With next-day delivery, comprehensive media services including drone photography, and 24/7 online booking, we make professional interior photography accessible and stress-free. Learn more about professional real estate photography services to understand how quality visuals impact your bottom line.
Frequently Asked Questions
What camera settings are best for interior design photography?
Use an aperture between f/5.6 and f/8 to keep the entire room sharp and in focus. Set ISO as low as possible (100-400) while maintaining proper exposure. Shutter speed depends on available light but typically ranges from 1/30 to 1/125 second. Use manual mode for consistent results across multiple shots. White balance should match your lighting conditions, use daylight (5500K) for natural light or tungsten (3200K) for warm interior lighting. Shoot in RAW format to preserve maximum detail for post-processing and color correction.
How do you get good lighting in interior design photography?
Maximize natural light by shooting during midday or early afternoon when sunlight streams through windows. Position your camera to capture window light as a primary light source, and use reflectors to bounce light into dark corners. For evening or overcast conditions, supplement with off-camera flash or continuous lighting positioned at 45-degree angles to avoid harsh shadows. Avoid mixing color temperatures, if using artificial light, match it to your natural light or vice versa. Always disable on-camera flash to prevent flat, unflattering illumination. Test lighting before your full shoot to identify problem areas and adjust positioning accordingly.
What lens is best for photographing interiors?
A wide-angle lens between 16mm and 35mm is essential for interior design photography because it captures entire rooms without stepping back excessively. A 24mm lens offers a good balance between width and minimal distortion. For tight spaces or small rooms, a 16-18mm ultra-wide lens helps show the full layout. Avoid extremely wide lenses (14mm or wider) unless you need dramatic perspective, as they introduce barrel distortion that requires correction in post-processing. A 50mm lens is useful for detail shots of design elements, textures, and accessories. Consider owning both a wide-angle and a standard prime lens to give yourself flexibility across different room sizes.
How should you prepare a room for an interior photoshoot?
Remove visual clutter by clearing surfaces, closing closet doors, and storing personal items out of frame. Declutter and style the space with a cohesive color palette, neutral tones and a few accent colors work best. Straighten vertical lines by ensuring curtains hang properly and furniture sits square to the walls. Clean all surfaces, windows, and mirrors to eliminate dust and reflections that distract from design details. Adjust lighting by opening blinds fully or partially depending on the time of day and desired effect. Stage focal points with carefully placed accessories that draw the eye without overwhelming the composition. If the space is occupied, coordinate access with tenants in advance and ensure the room is guest-ready before the photographer arrives.
BOOK NOW

Comments